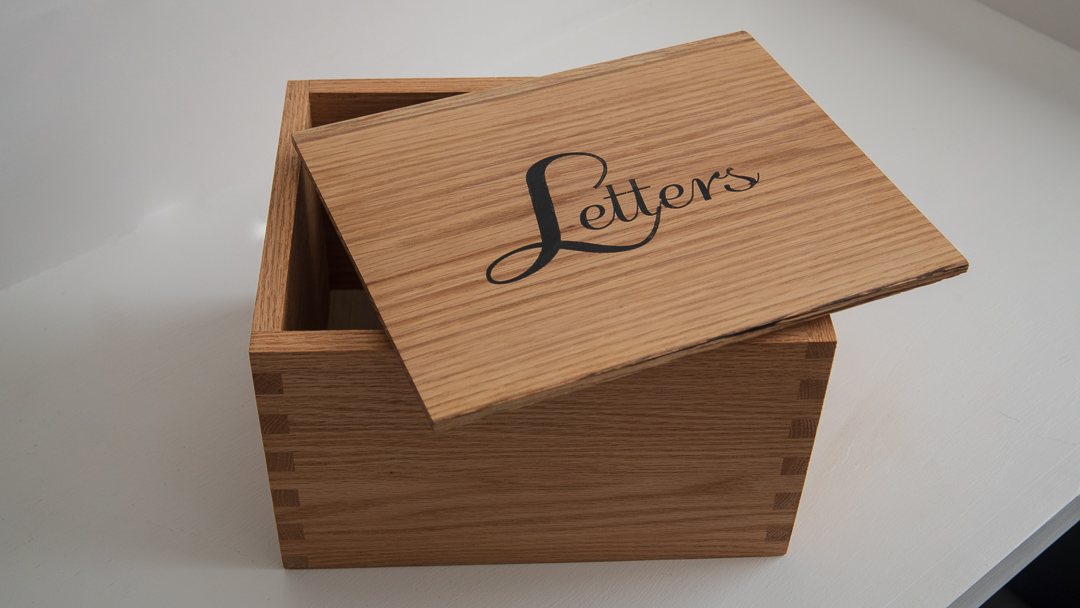
Finger Jointed Box with Epoxy Inlay
Here's how I made a gift box to hold letters for a friend! My router table and box joint jig made this super fast.
This post contains affiliate links, for more information see my disclosures page.
This post contains affiliate links.
This is going to be a simple quick build, and the router table I built a few projects ago is going to make it a lot easier.
Off camera I milled down some white oak to about 1/2”, if you don’t have milling machines though you can normally pick up 1/2” lumber from the big home centers.
The first thing I did was break it down to the dimensions I needed by ripping it on the table saw, and then cutting it to length at the miter saw, but both of these steps could be performed with a circular saw and straight edge.
As for joinery I’m going with finger joints at my router table because it’s still new and exciting to me to use it. Finger joints are also easily done with a router jig, or at the table saw with a simple jig.
Finger joints work great on thin stock because the fingers create a significant amount of glue surface while still being quick to cut and not requiring any reinforcement.
Off camera before I started cutting the finger joints on the box pieces, I used several scraps to get my jig and router bit height set correctly. As always when working with machines, test cuts are how to get good results. But nevertheless, I went ahead and did a dry fit of the pieces before gluing up just to make sure all was good.
I didn’t want a hot mess of glue everywhere, so I used an acid brush to spread a light coat of glue on one joint at a time and then put it together while the glue was still wet. Once all four corners were kind of together I put clamps on to squeeze it home. I made sure to used multiple clamps at a time to apply more even pressure, a single clamp in the middle might end up cracking these thin boards instead of pushing them together.
After it was clamped up I checked with a square to make sure everything was square and it was! Another nice thing about box joints is if you’re lumber is good and flat, once it’s clamped up properly they tend to be square or close to it.
I cut my fingers a bit more proud than needed, so instead of flushing them up with my random orbit sander I started at my belt sander with a 100 grit belt. It’s aggressive enough to move quickly, but not so aggressive that it’ll cause a mess faster than I can catch it.
White oak is a really splintery wood and I didn’t have some splintering when I cut the joints, so I used some wood putty to fill in any bits before sanding everything down off camera.
Now it’s time to put a bottom in the box. I opted for plywood because it’s very stable and shouldn’t expand and put pressure on the box sides. I don’t want the bottom visible, so I cut a rabbet on the inside in two passes at my router table. The second pass is just a hair deeper than the plywood is thick so that way the box will rest on the bottom of the sides, and not the plywood.
Instead of squaring the corners of the rabbet, I decided to use my corner radius jig and round the corners of the plywood. My rabbeting bit was a 1 1/4” diameter so I use the 1 1/4” radius and you probably figured it out already.. it didn’t fit. I forgot that the radius is half of the diameter, so I cut another bottom and this time use the proper 5/8” radius guide and a flush trim bit. All it takes is a light sanding and it fits great before getting glued in.
And if you’ve been following along closely, you’ll know this box still doesn’t have a top. That’s where my buddy Bruce, his links are below, comes in. Fortunately, he had some similarly toned white oak so he milled it up and glued up a panel for me.
The laser engraving looks great, but in the time it’s been in my shop it’s already turned into a bit of a dust catch and because the white oak is a little splintery, it’s really hard to get out. So I decided an epoxy fill would be best. I whip up some 1 to 1 epoxy and add some natural eyeliner as a dark tint, that’s a tip I picked up from Peter Brown, an eyeliner sampler is a great way to get a cheap variety of colors and it’s normally made from the same stuff as tints made for epoxy.
This is a fairly delicate pour and I wanted to make sure the epoxy really got into the cracks so I used a craft stick drizzle it in and spread it into the engraving. Then I came back with a tooth pick and used it to help release the air trapped in the bottom of some of the letters.
I gave it some time and then came back with a heat gun to pop the air bubbles that had come to the surface. You don’t need a lot of heat here, the idea is to just get the air to expand enough to break the surface tension of the epoxy. Too much heat and you can affect the cure of the epoxy.
After the epoxy cured, I came back with the heat gun to warm up the top layer to make chiseling it off go a bit easier. The stops in my t-track help the piece still and made this really easy to do. Then I ran through the grits on the top with my random orbit sander.
We’re going to zip back in time a bit to before I glued the bottom on, I centered the writing where I thought it look best in the box and then used the box to mark out where it needed to be cut. The miter saw made quick work of bringing it down to size.
I’m going to cut a rabbet on the underside of the lid so it’ll stay on the box. I used the box again to mark how far in the rabbet should be before ripping it on my table saw. This could’ve been done with other tools, but I still had the ripping blade in my table saw and thought that’d be the fastest.
After I cut all I could safely on the table saw, I used my chisel and shoulder plane to clean up the rabbet.
The last step before finishing is polishing the epoxy. For that I like to use this micro mesh kit and wet sand it. A quick run through the grits and the epoxy looks great.
For finish, I used 3 coats of General Finishes Arm-R-Seal and lightly sanded between coats with 400 grit.