Pizza Peels: Batching for Gifts
This post contains affiliate links, for more information see my disclosures page.
Check out the tools I use.
Whether you make pizza from scratch, use frozen, or pick up take-and-bake pizzas, a pizza peel is a handy kitchen tool for getting your pizza in and out of the oven. Especially if you like the crisper crust that comes from baking directly on the grill.
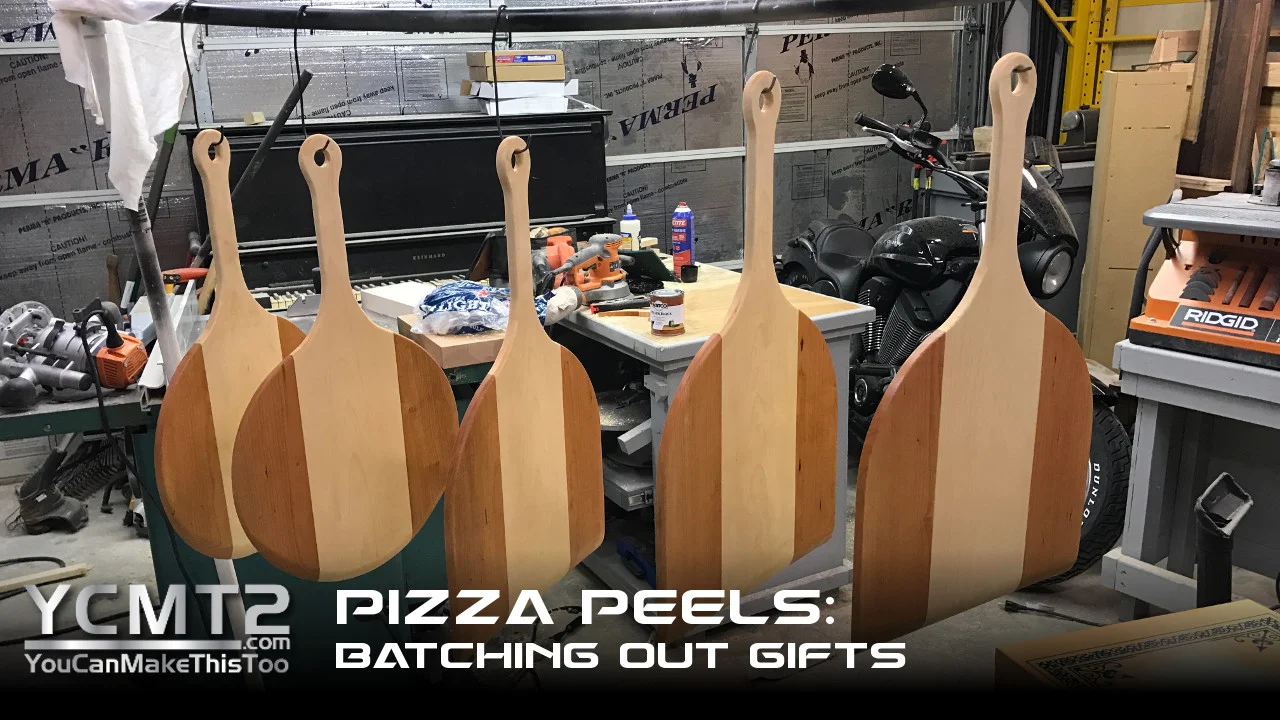
To make six pizza peels for gifts for family and friends, I started with some 8/4 (true 2" thick) soft maple and cherry boards. I ripped those boards into three boards that ended up being approximately 5/8" thick. This was more economical than getting 1" boards because I would have had to start with three boards, and a fair bit of them would have just been turned into sawdust to get to an appropriate thickness.
But, if you don't have a machine for ripping lumber, you could just buy thinner boards that are already surfaced. The material will be slightly more expensive, but a lot cheaper than big machines.
Once I had the boards milled to size, the rest was very straight forward. The soft maple was glued alongside the cherry to create a two tone pizza peel, then the shape was traced onto the boards using a compass and some random round containers of various sizes to get the curves I wanted.
All the cutting was down on the bandsaw, but it could have been done with a jig saw. After that is just a lot of sanding to refine the shape and get everything smoothed out. I used my oscillating belt sander and hand belt sander for the sharing and refining, and then switched to a random orbit sander and hand sanding for smoothing. I also added a hole in the handle so the peel can be hung on a wall.
The finish applied was a few coats of Watco's Butcher Block Oil with light sanding in between.