Bringing My Vintage Avion Trailer Home

This post is sponsored by The Home Depot Prospective tool review program and contains affiliate links.
I bought a 1965 Avion T-27! Getting it home and somewhere I could work on it was quite the adventure and required a LOT of work! But, I’m super excited about getting this thing back into useable shape for my family to enjoy.
Tools I used:
I was a little hesitant about pulling this vintage camper the 150 miles back to my house. It had been recently moved, and that made me feel more confident about the move but I still took some steps to make sure it would make the journey without incident.
My main concerns were pieces coming off the trailer, it coming loose from the truck, and issues with the tires. A few minutes of inspection made me comfortable I wouldn’t leave any debris on the road and that the trailer coupler and chains were sound.
As for the tires I checked their pressure, aired up as needed, and used the Ridgid Octane Impact Wrench to make sure all of the lug nuts were tight. With that tool in my box, here’s to hoping I never use a tire iron again.

Tightening lug nuts with the Ridgid Octane Impact Wrench
Some extra precautions I took were having my wife pull the trailer while I was outside watching and listening how everything moved, before we hit the road. I also stopped and checked everything after towing for about 10 minutes, and made sure to do so every hour.
Fortunately the trip home was uneventful, but that was really the easy part. To get this project done in any kind of reasonable time frame, I knew it needed to be at my house where it’s easy to get to work on it. In my area, that means the back yard.

Removing pickets with the Dewalt Engineer Hammer
But there’s no easy way to get to the back yard. The one gate I have is too small and on the wrong side of the house. The proper side is fenced in and has a side slope. Because this will be such a long term project, I decided it would be worth taking a day to remove the fence, get it back there, and put it back up.

Removing the fence panels with the Ryobi One+ Impact Driver
The Dewalt Engineer Hammer was perfect for removing the pickets were that nailed on and blocking the screws that secured the panels to the posts. Then I used the Ryobi Impact Driver to remove the fence panels from the posts and set them aside. The fence is pretty weathered and getting slick from the rain, but my max impact gloves gave good grip and kept me from getting any splinters.
The fence posts were still in the way though, so I used my Milwaukee SAWZALL to cut them down. But, I made sure to cut them high enough that I can bracket them back together later.
Then the lane was clear to back the vintage camper into my back yard. Fortunately, my trailer backing skills hadn’t deteriorated as much as I had feared and it went back pretty easy.
With the trailer in place it was time to put the fence back together. I used the Ryobi Impact Driver to install some post cap brackets and then scab a 2x4 onto the side of the fence posts. They’re practically as strong as they were before I cut them in half.

Securing the fence post to my brick wall with 5” TAPCONs
Of the three posts I had to remove. One of them will have to be removed again to get the trailer back out. So instead of reattaching it to its base, I used TAPCONs to attach it to my brick wall. The Milwaukee level made sure my fence would be plumb when I attach the panel to it. Now when it’s time to pull this trailer out, I’ll only have to remove one fence panel and won’t touch any of the posts.
Now back to the trailer. My backyard has a bit of a slope, so I needed to level out the trailer. I also wanted to get it elevated anyway so I could remove the wheels and inspect the brakes and hubs.
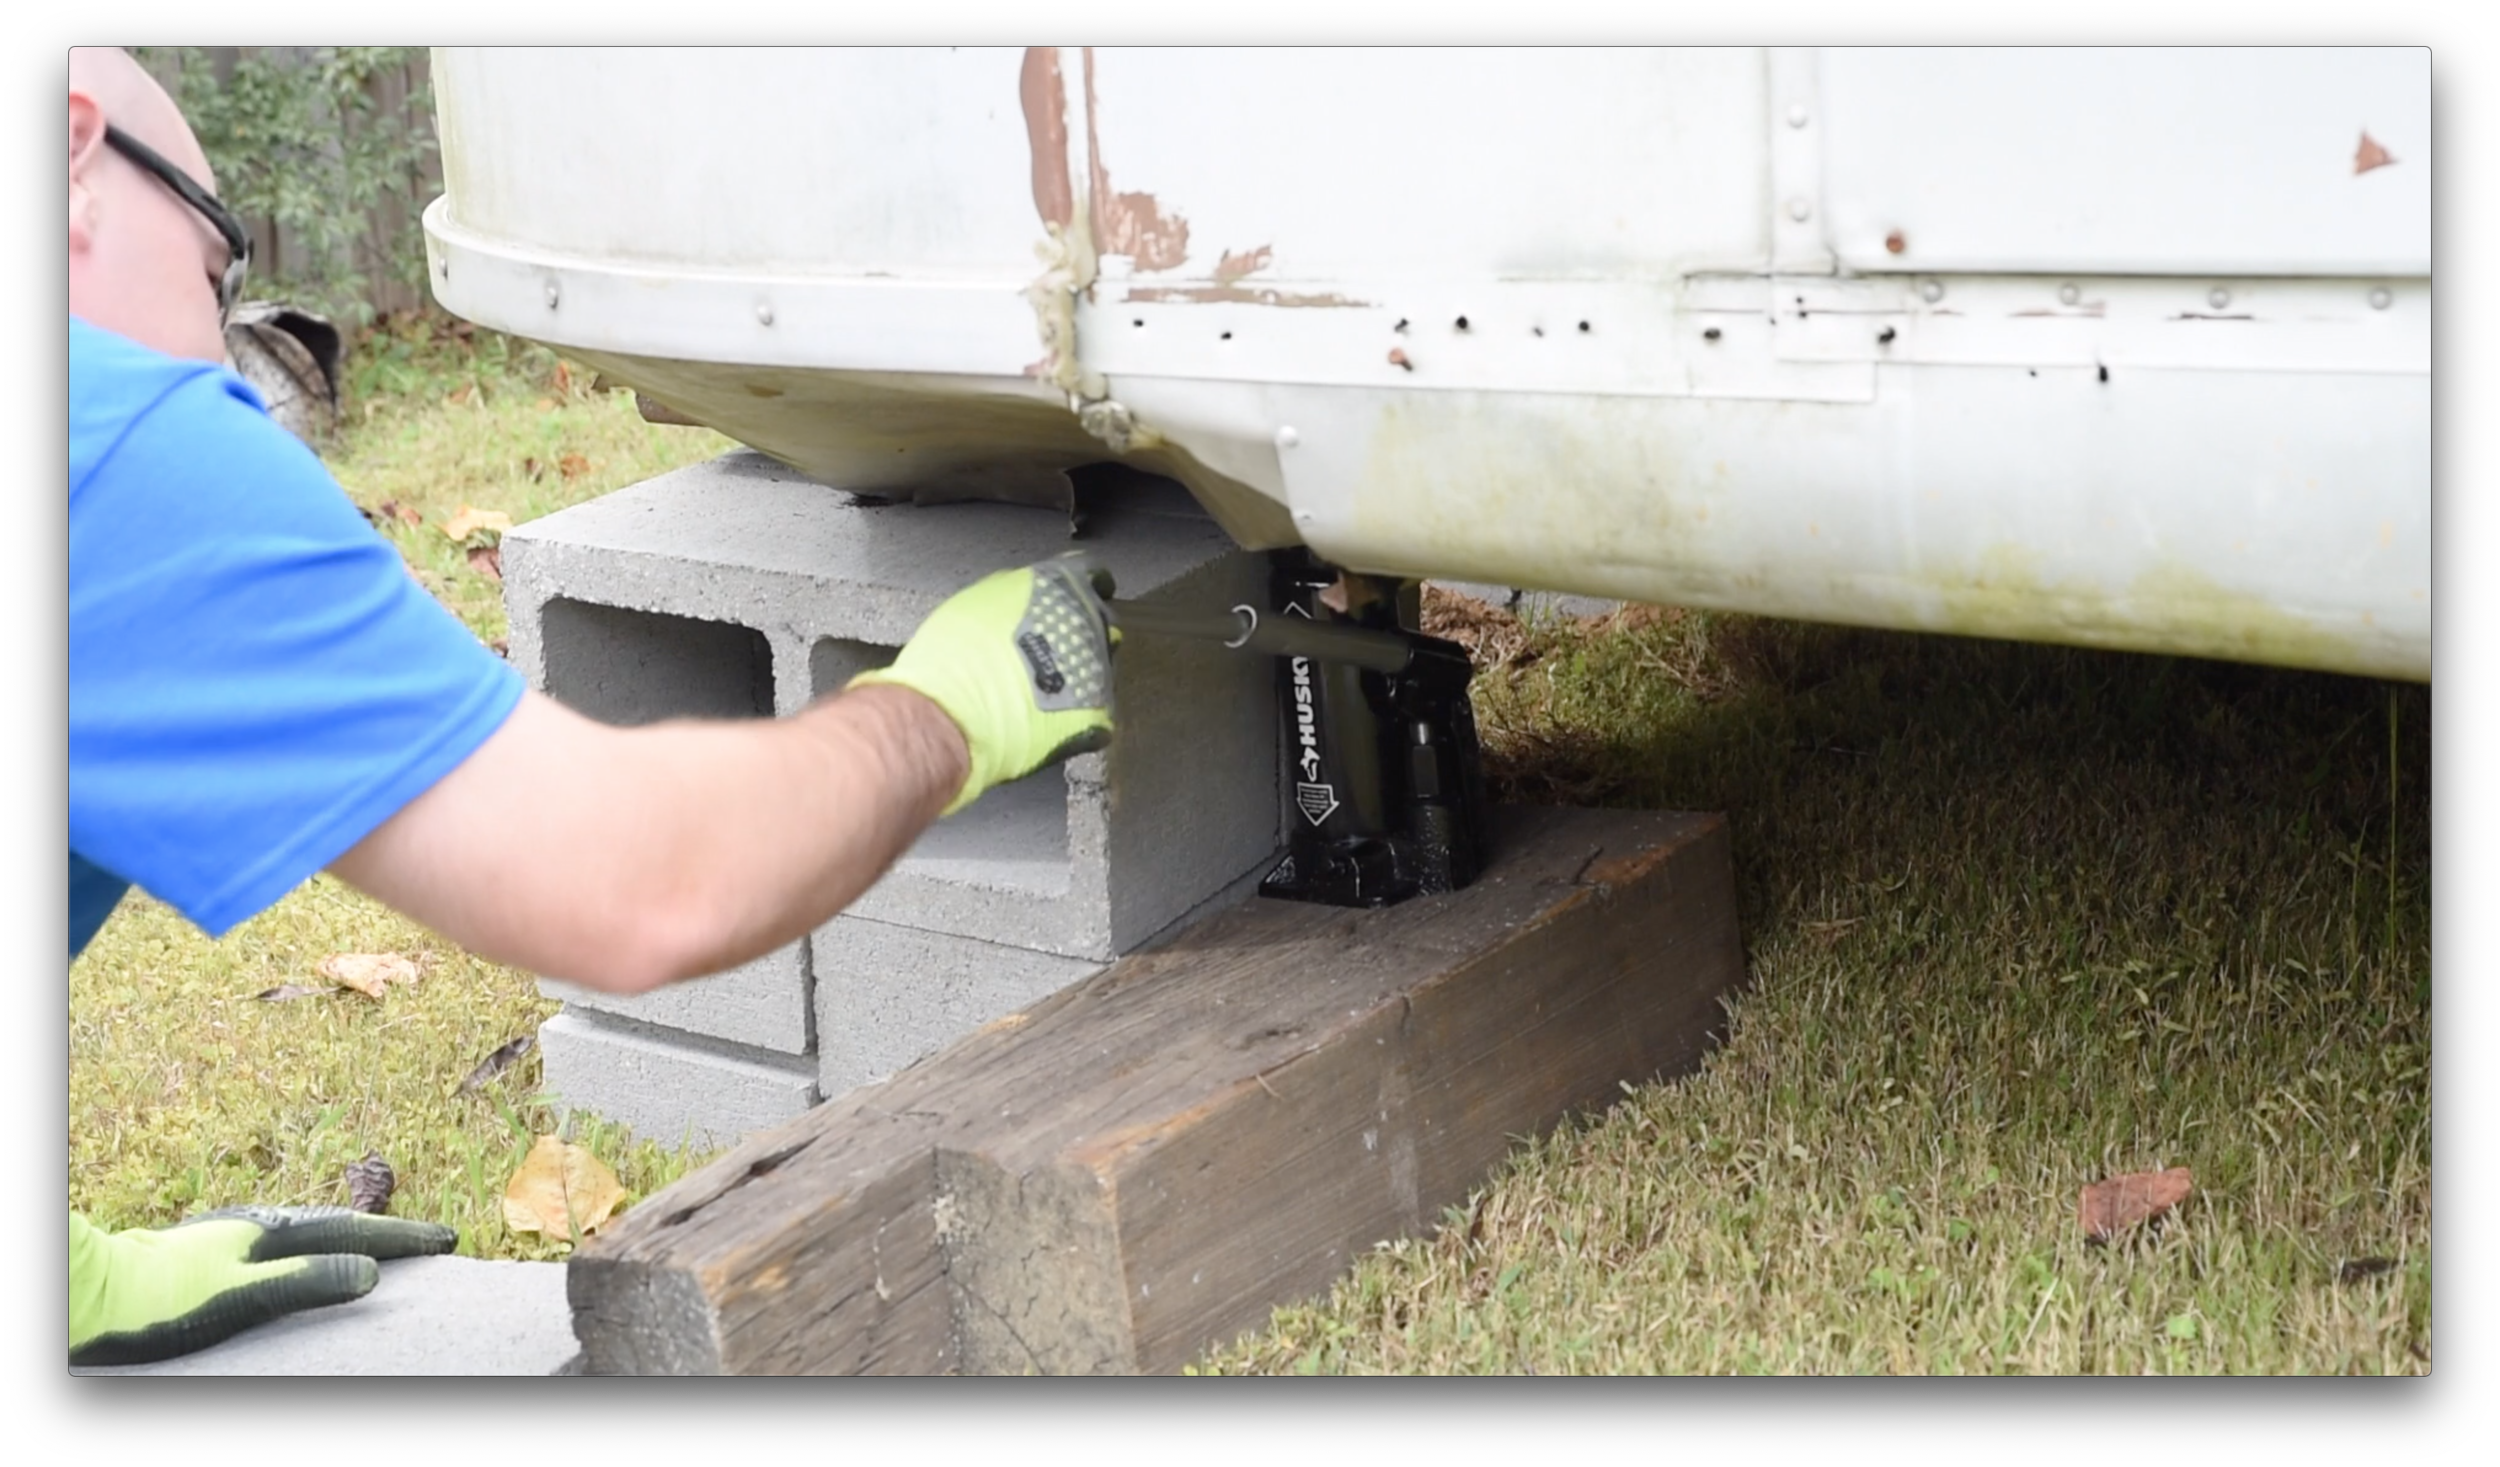
Raising the rear of the Avion Vintage Camper with a Husky 6 ton bottle jack
I used a Husky 6 ton bottle jack to raise the Avion so I could build up 8x8x16 concrete blocks under it until it was pretty close to level. At this point the vintage camper is solid and no longer rocking.

Removing the Avion Vintage Camper tires with the Ryobi Impact Wrench
The Ryobi and Ridgid impact wrenches make quick work of removing the tires. I like the auto mode and brushless motor on the Ridgid, but the Ryobi uses more common 3/8” sockets. Some of the brake shoes were rubbing and the suspension seems locked up. When I dig into more I’ll find out if they can be repaired or if I just need to replace everything down there.

Cleaning out the camper, glad to have good gloves
And now I can finally get to the part I’d really been looking forward to, cleaning out the camper and getting a good look around. It had been partially gutted so there was a lot of debris laying around. There were also some remnants from the last people who lived in the trailer and some of the critters that had moved in since. Let’s just say I was happy to have some good gloves on.

Front of the 1965 Avion T-27 Travecade

Kitchen area of the 1965 Avion T-27 Travecade

Rear of the 1965 Avion T-27 Travecade
And with all that work done, I can start to get to the real work of renovating this vintage Avion camper!